
Create your own MLFlow custom flavors for model registry
A minimal tutorial on how to write your own MLFlow flavor code to save, log, load models with tests.
MLFlow Model Registry
MLFlow is great for managing the machine learning model deployment lifecycle. But soon I ran into the question of “What if my model isn’t supported by MLFlow?” In particular, to register a model to the Model Registry, you must call mlflow.<flavor>.log_model() – but what if the flavor does not exist?
In this post, I will show you how to write a custom flavor code with tests that extends the list of MLFlow supported flavors so you can save ANY model to MLFlow.
Example code
I put all my example code in this post in the repository:
- https://github.com/changhsinlee/mlflow-flavor-example
with the caveat that I did not set up the Model Registry backend in the repo.
The code
There are three functions that you need to create in order to make MLFlow work:
save_model()- Implementation of model specific saving methodslog_model()- Registers model to Model Registry. Callssave_model()under the hood.load_model()- Loads model from Model Registry. This is mostly used at inference time.
Let’s go through each one of them.
When writing your custom flavor code, I recommend looking into how other flavors are implemented in the official repo. It will help you decide how much you need to implement for your own use case.
For example,
- PyTorch - [flavor code] [test suite]
- spaCy - [flavor code] [test suite]
What’s in the code
For demonstration purpose, instead of using a real ML library like huggingface, I’m using a fake object called FakeModel() here that has save(), load(), and predict() methods
import pickle
from pathlib import Path


class FakeModel:
    def __init__(self, offset):
        self.offset = offset

    def __eq__(self, other):
        return self.offset == other.offset

    def predict(self, input_num: float):
        return input_num + self.offset

    def save(self, path):
        pickle.dump(self, Path(path).open(mode="wb"))

    @classmethod
    def load(cls, path):
        return pickle.load(Path(path).open(mode="rb"))
My goal is that, if I run
model = FakeModel(3)
# assuming this model is registered to Model Registry
log_model(model, artifact_path=artifact_directory)
then I should be able to pass the following test
# assuming model_uri points to the model I saved above
loaded_model = load_model(mode_uri)
assert 7 == loaded_model.predict(4)  # 3 + 4 = 7
You can replace the FakeModel with a heavy hitter model but the general code pattern will be the same.
Let’s go into the three functions.
Function 1. save_model()
This one is the longest.
You can view the source code for this part on GitHub for better formatting.
from mlflow.models import Model
from mlflow_flavor_example.utils import FakeModel
from mlflow.models.model import MLMODEL_FILE_NAME
from pathlib import Path
from mlflow.tracking.artifact_utils import _download_artifact_from_uri
FLAVOR_NAME = "my_flavor"
def save_model(
fake_model: FakeModel,
path,
mlflow_model=None,
):
path = Path(path).resolve()
path.mkdir(parents=True, exist_ok=True)
mlflow_mlmodel_file_path = path / MLMODEL_FILE_NAME
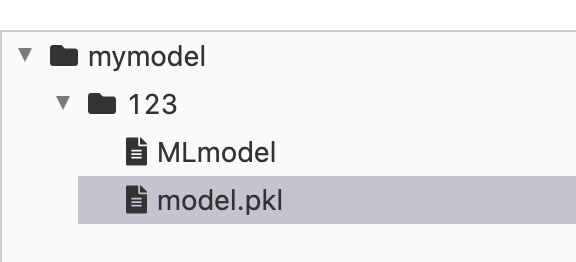
model_subpath = path / "model.pkl"
if mlflow_model is None:
mlflow_model = Model()
mlflow_model.add_flavor(FLAVOR_NAME, foo=123, bar="abc", offset=fake_model.offset)
mlflow_model.save(mlflow_mlmodel_file_path)
fake_model.save(model_subpath)
In this example, fake_model is the only argument that points to a model object. But you can actually put as many objects here as you want. For NLP, you may need both the model and the tokenizer. Or you may want to save both the encoder and decoder for an autoencoder separately. The key here is that you need to decide how your model/tokenizer/encoder should be saved with their respective methods because it determines how they are loaded in load_model().
model_subpath = path / "model.pkl"
# you will see this line's counterpart in load_model()
fake_model.save(model_subpath)
The path model_subpath determines where the model weight is saved in the artifacts folder.
We also need to save an artifact called MLModel:
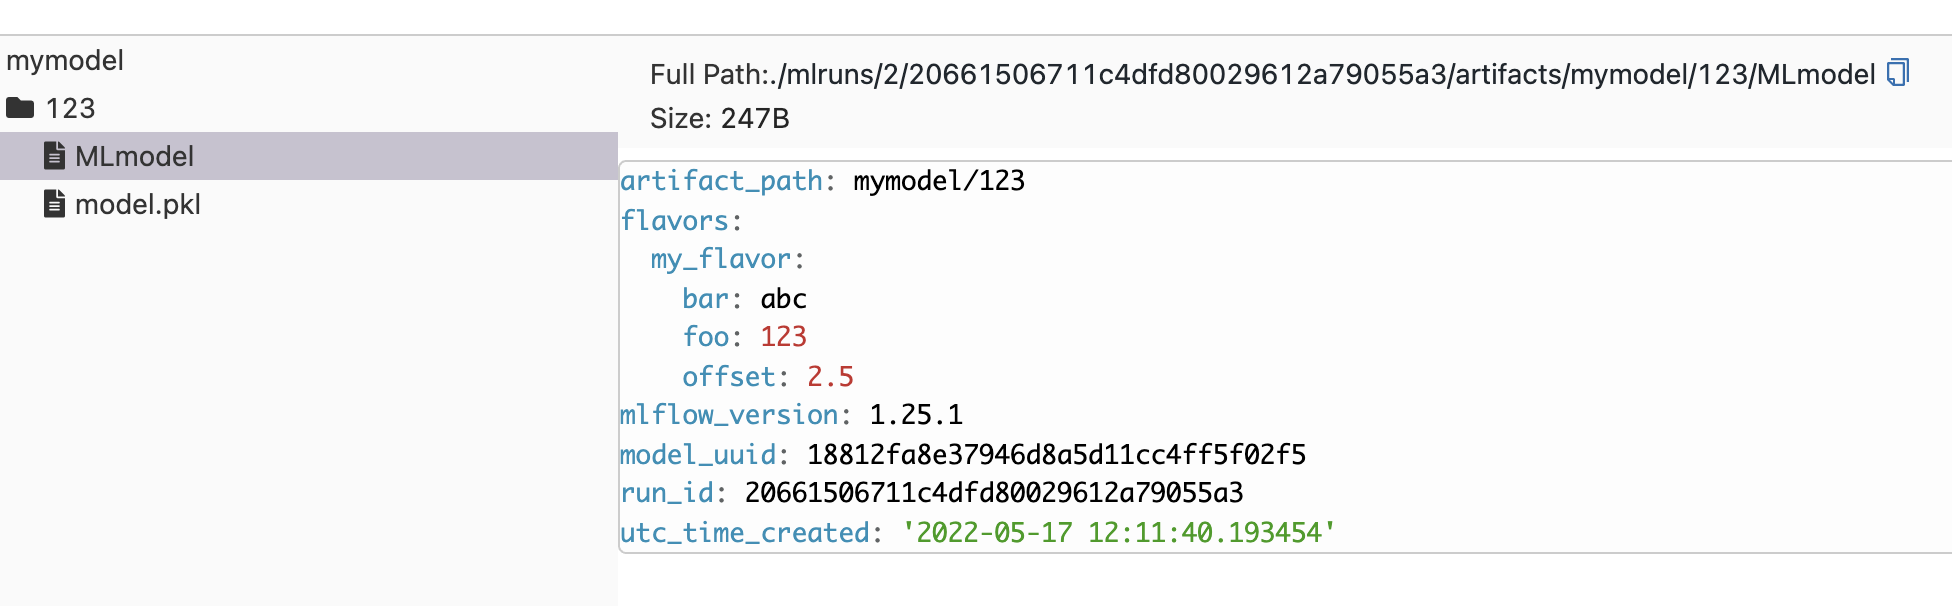
MLFlow uses this file to store flavor metadata related to the model and we can implement it by
from mlflow.models import Model
from mlflow.models.model import MLMODEL_FILE_NAME

if mlflow_model is None:
        mlflow_model = Model()
mlflow_model.add_flavor(FLAVOR_NAME, foo=123, bar="abc", offset=fake_model.offset)
mlflow_model.save(mlflow_mlmodel_file_path)
The foo, bar, offset in the add_flavor() call here can be any metadata that you want to log or load at inference time.
Function 2. log_model()
You can view the source code for this part on GitHub for better formatting.
from mlflow_flavor_example.utils import FakeModel
import mlflow_flavor_example

def log_model(
    model: FakeModel,
    artifact_path,
    **kwargs,
):
    return Model.log(
        artifact_path=str(artifact_path),  # must be string, numbers etc
        flavor=mlflow_flavor_example.flavor,  # points to this module itself
        fake_model=model,
        **kwargs,
    )
This function is a short wrapper around save_model(). The only part that was confusing to me was that I need to set
flavor=<name_of_the_module>.flavor
despite the fact that I did not declare flavor anywhere in the module. Here, name_of_the_module is mlflow_flavor_example that I imported at the top. Because this is a MLFlow specific interface, I just follow the convention.
Function 3. load_model()
You can view the source code for this part on GitHub for better formatting.
from mlflow.tracking.artifact_utils import _download_artifact_from_uri

def load_model(model_uri, dst_path=None):
    local_model_path = _download_artifact_from_uri(
        artifact_uri=model_uri, output_path=dst_path
    )
    model_subpath = Path(local_model_path) / "model.pkl"
    return FakeModel.load(model_subpath)
This one is also short. It use the utility _download_artifact_from_uri() provided by MLFlow which downloads the artifact folder, whose structure we defined in save_model(), and load the model files based on the corresponding methods from how we saved the files in save_model()
Note that there are two things I didn’t explore here:
-
How do I pull metadata out of the flavor file
MLModel? I think this is a good example from the spaCy flavor:from mlflow.utils.model_utils import _get_flavor_configuration flavor_conf = _get_flavor_configuration(model_path=local_model_path, flavor_name=FLAVOR_NAME) spacy_model_file_path = os.path.join(local_model_path, flavor_conf.get("data", "model.spacy"))Basically, I can use the
_get_flavor_configuration()utility which loadsMLModelas a dictionary intoflavor_conf, then grab the values from said dictionary. -
What if I have more than one model weights to load? If you save multiple things in
save_model(), then it makes sense to load all of them here and return aTuple. An example would be returning bothtokenizerandmodelfor an NLP model.
Testing
Let’s write a test for them. I use pytest.
The single most useful test here, in my opinion, is an integration test that tests both save_model() and load_model(). You can see the example here:
- https://github.com/changhsinlee/mlflow-flavor-example/blob/main/tests/test_flavor.py
The question here becomes how do we set up the tests without calling a remote MLFlow server. Fortunately, the MLFlow team has it set up, so I copied the conftest.py from the MLFlow test suite and deleted parts that I don’t need:
- https://github.com/changhsinlee/mlflow-flavor-example/blob/main/tests/conftest.py
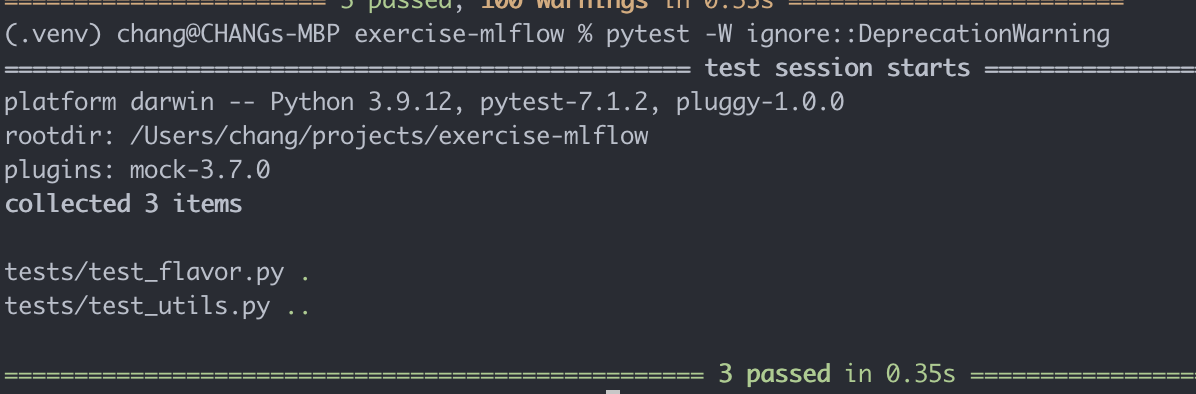
Under the hood, the fixtures here spin up an in-memory SQLite instance to act as temporary MLFlow backend. So when you run this integration test, it is as if you are calling a real MLFlow server. This is a better testing strategy than mocking so I am happy to keep it this way. To run the tests, I can use pytest -W ignore::DeprecationWarning to suppress DeprecationWarnings.
You can add other tests by looking at other flavor’s source code.
What else you can do
If you compare the code here with the MLFlow flavor code in the official repository, you can see that I skipped quite a lot of stuff:
- I didn’t touch
autolog()at all since I don’t use this pattern at work or for my personal projects. - I don’t like using
pyfunc(). - No
requirements.txtorcondafiles: I believe this is better taken cared of at the project setup level. If the run environment comes withgit, then MLFlow Experiment can track the git hash. So one should be able to reproduce the results ifrequirements.txtor other project dependency files likepyproject.tomlis part of the repository anyway. A huge chunk of the official source code is about dealing with dependencies but I didn’t need this. - No Signature or Examples: this depends on how you use MLFlow. I didn’t need this either.
and you can pick and choose what you want to do with your own use cases.